Jupyter on UT HPC cluster for course "Deep Learning for Computer Vision 2025 spring"
Jupyter on HPC
The Jupyter-notebook is run on UT HPC cluster managed by Slurm. A Slurm cluster consists of multiple connected servers (called nodes) with different specifications. These nodes are grouped into partitions based on their hardware capabilities. Instead of launching a virtual machine (VM) like in a cloud environment, you submit a job specifying the required CPU, RAM, GPU, and runtime. Slurm automatically schedules the job on available compute nodes, optimizing resource allocation and queuing jobs when necessary. jupyter.hpc.ut.ee web service automates job submission for you.
Warning
Don't expect GPUs to be available at all times! So, don't leave your HM at the last minute.
Notes
If you have a question and/or require support, you can dm in slack channel to Vlad - HPC sysadmin or email to support@hpc.ut.ee. Don't expect to get rapid responses on weekends!
jupyter.hpc.ut.ee
-
Login in jupyter.hpc.ut.ee with your UT credentials
-
Select ML Profile and press Start. The available options are:
- V100 with 16 GB VRAM
- V100 with 32 GB VRAM
These profiles come pre-loaded with
CUDA 11.3andcuDNN 8.2.0.53.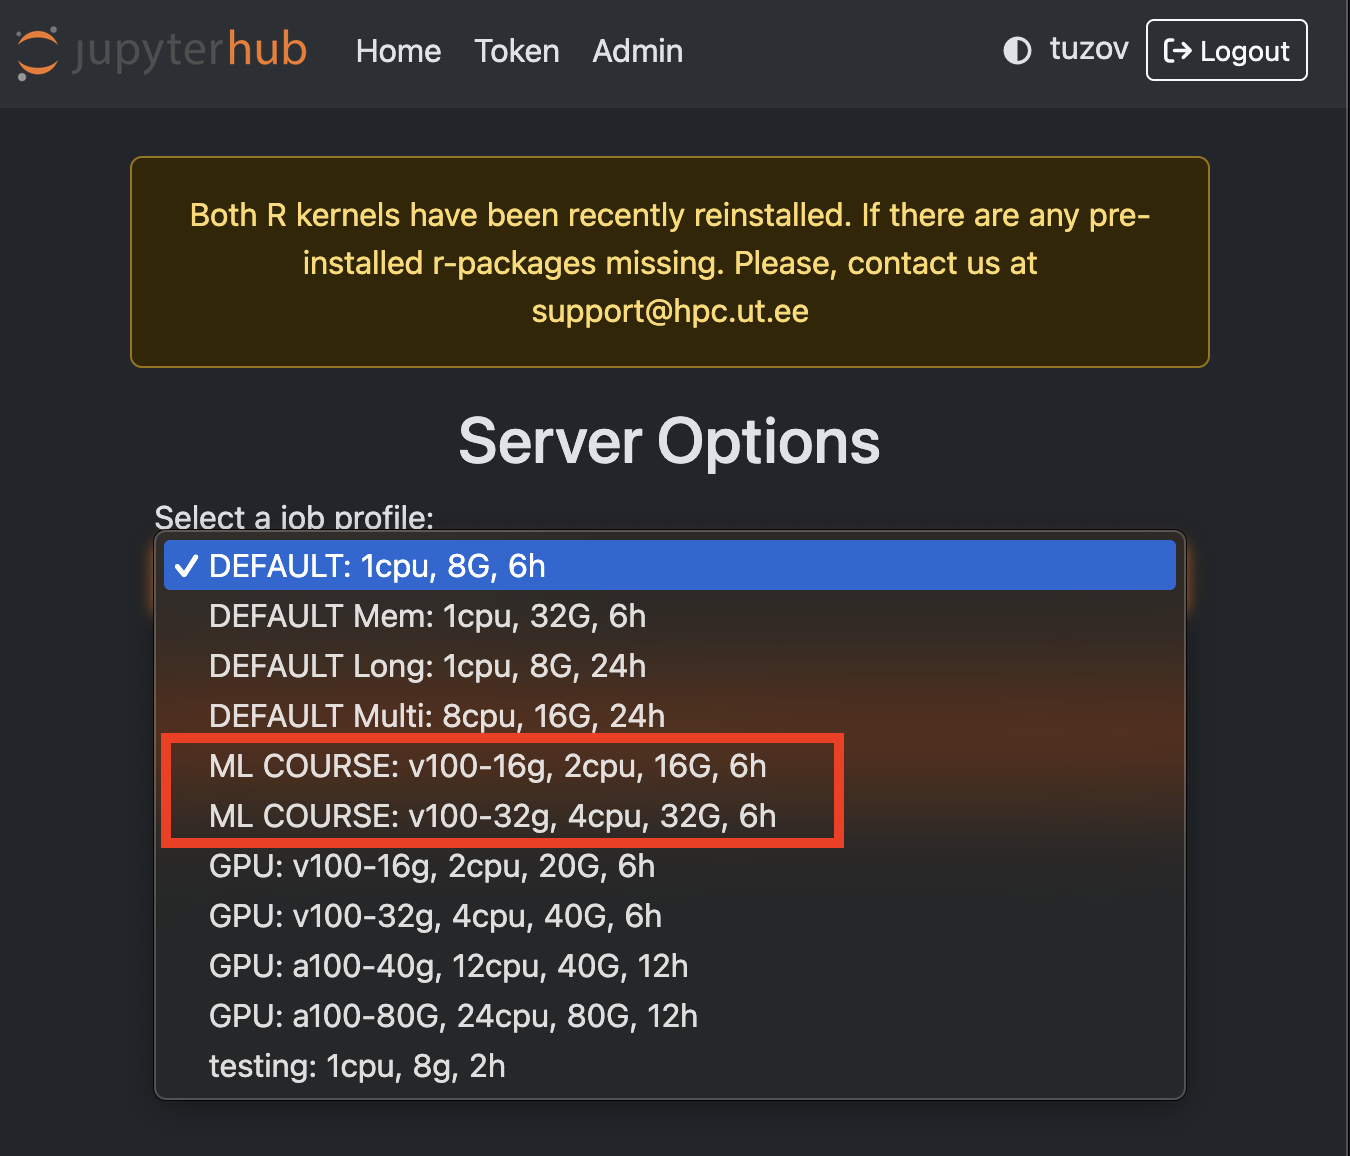
-
The Jupyter notebook will continue running even if you close the tab. Be considerate of the cluster resources and stop your server after finishing your work (click on File -> Hub Control Panel -> Stop My Server)
Troubleshooting: Spawning Fails
If your Jupyter server fails to start, possible reasons include:
- No available GPUs: The GPU partition is full.
- Unexpected issues: Something went wrong with Slurm or Jupyter.
Solutions:
- Try selecting a different profile (the 16 GB GPUs are often more available).
-
Check GPU availability, ssh into
rocket.hpc.ut.eeand running the command:If the state is "mixed" or "idle" it means GPUs are available in the partition. Keep in mind, falcon3 node hosts V100 16 GB VRAM, while falcon[1-2,4-6] have 32 GB ones.slstat -p gpu -
If GPUs are free but your job is still pending, wait or contact Vlad.
Create your python environment
Here's a quick guide to setting up your Python environment on jupyter.hpc.ut.ee for the Deep Learning for Computer Vision course.
Keep in mind that once your server spawned, it has a Timelimit of 6 hours. Please, be kind to the cluster and stop your server after finishing your work. Closing the tab does not stop the server; it will keep running until the time limit expires.
To manage libraries you have to install your own python enviroment/Jupyter kernel: 1. Login in Jupyter and open Terminal
virtualenv dl4cv
source dl4cv/bin/activate

pip install <package_name>
# You might need to close Terminal and open it again, if you get an OS.Error
python -m ipykernel install --user --name dl4cv
-
You can install all necessary packages for
1_Introduction_to_CV_completenotebook by coping the providedrequirements.txtand commandpip install -r requirements.txtdl4cv-requirements.txt -
Wait a moment, then reload the page. The dl4cv kernel should now appear. The kernel has all the necessary libraries for Deep Learning notebook.
-
open notebook and do your thing, just ensure to select
dl4cvkernel
Library conversion from google.colab to Jupyter
HW1
eval_js -> No module named 'google.colab'
- update
packagingto version 22.0 and installjs2pypip install --upgrade packaging==22.0 pip install js2py - load
eval_jsfromjs2pylibrary, as follows:from js2py import eval_js
Other
In the notebook, due to version differences between colab and Jupyter, you may need to change some function parameter names, for example,
# INSTEAD OF
#from tensorflow.keras.applications.resnet18 import ResNet18
# USE
#from tensorflow.keras.applications.resnet50 import ResNet50
Important
If you need to install TensorFlow, do not install a version higher than 2.14, as it may cause TensorFlow bugs to lose CUDA/cuDNN.